
Reviewed · FISHERMAN'S WHARF & PIER 39
An Exciting Scavenger Hunt: Along Fisherman’s Wharf
Scavenger hunts along the bay are a blast. This self-guided adventure follows Fisherman’s Wharf from working fishing roots to tourist magnet, with an app that keeps you moving and lets you start whenever you want. You’ll solve riddles, compete in teams, and hunt for the little details that make this stretch of San Francisco feel like a story you can walk through.
I especially like the photo challenges and role system, because everyone can play in a different way (Braniac, Photographer, or Mapper) instead of everyone doing the same thing. I also like that it’s built for momentum: you’re never left guessing where to go, with maps and help inside the app as you work through the route.
One consideration: there’s no tour guide here, and the process to start the scavenger hunt can feel confusing at first. If you want the smooth experience, plan a couple minutes to set up before you’re deep into the game.
In This Review
- Key things I’d plan for
- Fisherman’s Wharf, turned into a game you control
- Price and value: what $12.31 buys you
- Start time flexibility: a practical way to beat the crowds
- Getting going with the Let’s Roam app (without frustration)
- Your route in about two hours: how the pacing feels
- Stop-by-stop: the Wharf-to-landmarks storyline
- Pier 43 Ferry Arch and the Embarcadero flow
- San Francisco Art Institute and Coit Tower viewpoints
- Ghirardelli Square, then back again
- Maritime side: Aquatic Park, museums, and Hyde Street Pier
- Visitor center and maritime national park context
- The famous curves: Lombard Street’s puzzle-friendly loop
- Main Wharf attractions: Musee Mecanique to Madame Tussauds
- Angel Island State Park: a surprising stop on the route
- Pier 39 wrap-up: finish with the bay energy
- Photo challenges and roles: how to keep the game fun for everyone
- Who this scavenger hunt is best for
- Who should think twice (and how to make it easier)
- Should you book this Fisherman’s Wharf scavenger hunt?
- FAQ
- How long does the Fisherman’s Wharf scavenger hunt take?
- Can I start the hunt at any time?
- Where does the hunt start?
- What do I need to use during the hunt?
- Is there a guide with you?
- Can I get a refund if I cancel?
Key things I’d plan for
- Start on your schedule. No fixed departure time means you can choose the light, the crowd level, and your own pace.
- Three roles keep groups balanced. Braniac, Photographer, and Mapper make it easier for mixed-age teams to contribute.
- Maps and directions are built in. You’re not guessing your way around the Wharf area.
- Photo challenges add stakes. Your team earns momentum by choosing the right angle, not just reading clues.
- Questions can be tricky in a fun way. Expect some head-scratching, especially if you like an easy win.
- Bring a charged phone. The app is the whole engine of the hunt.
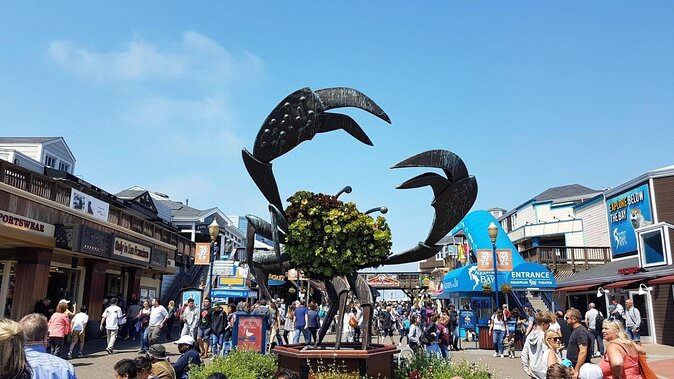
Sea lions, crab stands and more of the Wharf




Fisherman’s Wharf, turned into a game you control
Fisherman’s Wharf can be loud, touristy, and a little chaotic. This scavenger hunt flips that. Instead of aimlessly wandering, you’re following a set route with missions that nudge you to notice landmarks you’d otherwise miss.
You’ll work with or against your team, which adds energy without requiring you to be an expert. The app gives each player an individual role, so the game feels fair even when your group has different strengths and attention spans.
The big payoff for me is how well it helps you experience the neighborhood at walking pace. You’re still sightseeing, but your brain stays busy. You end up moving like you have a plan, not like you’re trying to escape a crowded boardwalk.
Price and value: what $12.31 buys you
At about $12.31 per person, this is priced like an activity, not a guided tour. What makes it feel like good value is that the price covers the structure: the route, the tasks, the photo challenges, and the app experience. You’re not paying for a guide’s time, so you’re paying for a complete self-guided game.
It also lasts long enough to be satisfying. The hunt is about two hours, which is a sweet spot for people who want something fun without committing to a full half-day. If you’re pairing it with classic Wharf stops afterward, it works well as a warm-up because it gets you oriented fast.
One more value point: you get digital copies of your adventure hunt photos. That matters if you’re the kind of group that always says we should take pictures, then never quite gets around to it.
Start time flexibility: a practical way to beat the crowds
A rare win here is the freedom to start when you want. Your hunt has opening hours from 7:00 AM to 10:00 PM, and you can begin any time during that window. That means you can pick a start time based on weather and foot traffic.
If you’re traveling with kids or mixed-energy adults, this is a big deal. You don’t have to herd everyone to a specific meeting time. You can also pause briefly if you need a bathroom stop or want a quick break without feeling like you’re falling behind.
Just keep your expectations realistic. Since it’s self-guided, you’re running your own schedule. Build in a little time to settle before you start the first clue.
Getting going with the Let’s Roam app (without frustration)
This hunt runs through the Let’s Roam app, using maps, photo challenges, riddles, and leaderboards. You’ll also use it to coordinate your role-based tasks and track progress across the route.
Here’s the practical tip: before you ever walk up to the start point, download the app and make sure you understand how to begin the adventure. Some people find the start process confusing, especially the first time they’re syncing roles and loading prompts.
Also: make sure your smartphone is fully charged. You’ll be using it for navigation and interaction, and the tour info specifically recommends a power bank if you need one. The Wharf area has plenty of places to grab power, but planning ahead is easier than improvising while you’re solving clues.
More puzzles and hunts around town



Your route in about two hours: how the pacing feels
The meeting point is at 2350 Taylor St, San Francisco, CA 94133. The activity ends back at the meeting point, so you’re not stuck figuring out a late exit or paying for a separate ride home from far away.
Expect a walking loop that threads through the waterfront, landmark viewpoints, and Wharf attractions. The route includes repeated areas (you’ll hit Lombard Street more than once, and Ghirardelli Square shows up twice), which is smart. It lets the game reframe the same neighborhood in a fresh way instead of feeling like pure repetition.
Two hours is enough time to enjoy the missions without turning it into a marathon. It’s also short enough that you can keep moving even if your group is split between people who want to sprint through clues and people who want to slow down to look at details.
Stop-by-stop: the Wharf-to-landmarks storyline
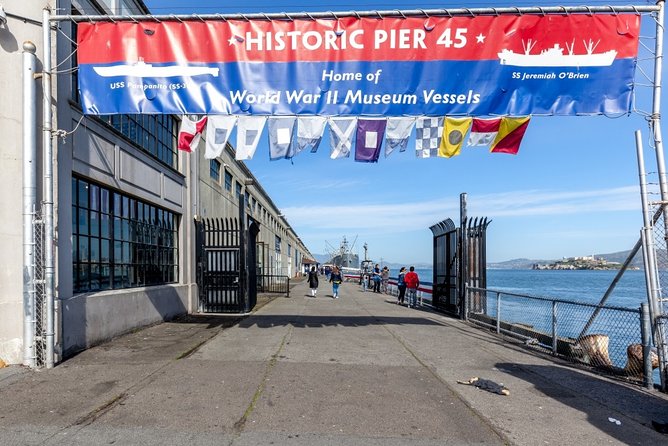
This hunt traces a San Francisco arc you can literally walk. It starts near ferry activity and the Embarcadero, works toward art and tall viewpoints, and then moves back into the Wharf entertainment zone. Along the way, you’ll be prompted to find landmarks and complete tasks tied to what you see around you.
A fun part is that you’re not just checking boxes. The app pushes you to observe. So when you reach a landmark like Coit Tower or Ghirardelli Square, you’re doing more than posing for a photo—you’re answering questions that make you look closely.
Pier 43 Ferry Arch and the Embarcadero flow
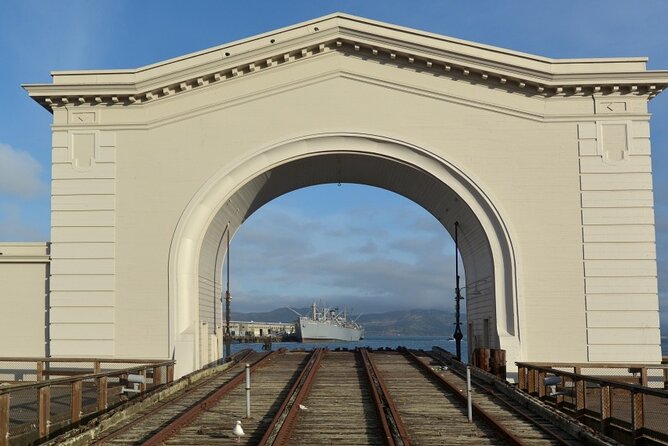
Your adventure opens at Pier 43 Ferry Arch. This is a good warm start because it places you in the working-ferry vibe of the area. You get that waterfront feel right away, and you’re ready to move without a long setup.
From there you move along the Embarcadero, a corridor that naturally guides your walking pace. If you like straightforward navigation, this section tends to feel easy because it’s hard to lose your bearings in a long, recognizable stretch.
San Francisco Art Institute and Coit Tower viewpoints
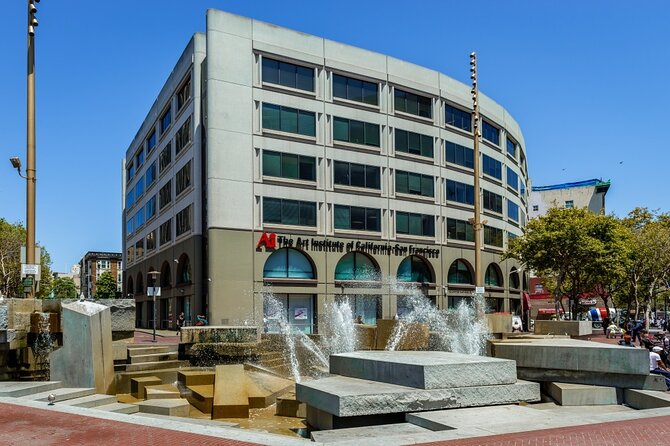
Next you’ll work in the area around the San Francisco Art Institute. Even if you don’t go inside anywhere, the stop helps break up the Wharf scene and reminds you this neighborhood isn’t only about seafood and postcards.
After that, the route brings you to Coit Tower. This is one of those landmarks that instantly changes the mood of the walk. It’s a natural place to pause, look around, and take in how different the city feels once you’re thinking about viewpoints.
Practical note: Coit Tower area can involve some uphill effort depending on the exact path you choose while following clues. If your group has limited mobility, keep it slow and plan comfortable shoes.
Ghirardelli Square, then back again
You’ll hit Ghirardelli Square on the way in, and later again as the route loops back. That repetition can sound like a lot, but it often works better than you’d think. First time, you build context. Second time, you’re solving a new set of photo prompts and riddles, which keeps it from feeling like you’re just passing the same storefront again.
If your group likes classic Wharf treats and people-watching, this is where you’ll feel the neighborhood’s tourist energy most strongly. Just remember the mission comes first—you’ll enjoy this more if you treat it like a checkpoint for clues, not only a place to browse.
Maritime side: Aquatic Park, museums, and Hyde Street Pier
The route includes San Francisco Maritime Museum / Aquatic Park Bathhouse Building and Aquatic Park later on. These stops give the hunt its maritime spine, tying together Wharf life with the broader harbor world.
Then there’s Hyde Street Pier, which is one of those “walk closer and you’ll get it” kind of places. Even if you’re not going inside any exhibits, the setting itself helps you understand why this part of the city grew around boats and the people who work with them.
One reason I like including maritime stops in a self-guided format: they help you slow down without losing interest. A riddle might ask you to focus on something specific, and suddenly the scene feels purposeful instead of random.
Visitor center and maritime national park context
You’ll also visit San Francisco Maritime National Historical Park’s Visitor Center. A visitor center is useful in any self-guided adventure because it’s typically a place you can use as a reference point when you want to reset and confirm you’re still on track with the app.
Even if you don’t spend long inside, it’s a solid anchor for the route. It also helps the hunt feel connected to real place, not just a set of unrelated tasks.
The famous curves: Lombard Street’s puzzle-friendly loop
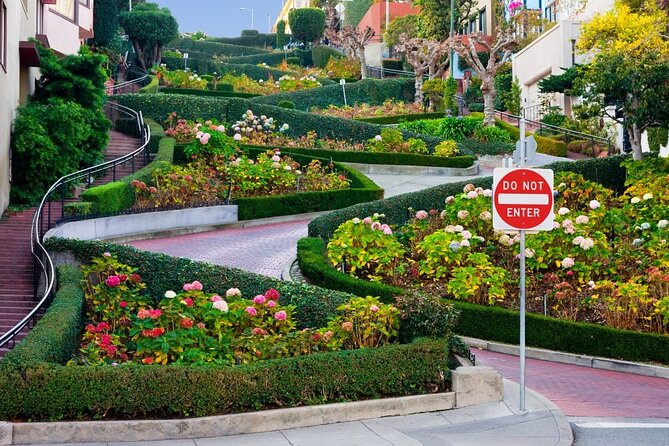
Yes, Lombard Street shows up twice. That’s a clever choice. The first pass helps you connect the clue story to what you’re walking toward. The second pass turns the area into a repeat landmark mission instead of just sightseeing.
Lombard Street is one of those spots where you can feel the city’s playful side. But it also gets busy. If you’re on a later start time, you’ll want to keep your group moving for the game tasks and not treat it like a long photo session unless you’re okay spending extra time.
Main Wharf attractions: Musee Mecanique to Madame Tussauds
As you continue the loop, the route includes Fisherman’s Wharf and Musee Mecanique. This is where the hunt leans into old-school, look-at-this energy. Musee Mecanique is a place where you’d normally slow down anyway, because it’s built for curiosity and hands-on attention.
Then you’ll reach Madame Tussauds. This is more of a pop-culture stop, and it works because the game tasks give you a reason to engage instead of only walking past.
If your group likes quirky attractions and quick photo moments, this is where the game keeps you from feeling like you’re just doing the same Wharf stroll everyone does.
Angel Island State Park: a surprising stop on the route
One of the more interesting inclusions is Angel Island State Park. On a Wharf walk, it’s not the most obvious choice. But as a mission stop, it gives the route a change in mood, and it expands the adventure beyond the immediate Wharf strip.
I can’t tell you what you’ll do inside any specific area because the exact tasks aren’t listed here, but the stop itself signals the hunt is looking outward as well as across the street. Expect at least some clue prompts that tie to views or recognizable scenery.
If you’re doing this in foggy weather or low visibility, your ability to match clues to what you can see may be affected. That’s where checking the weather forecast ahead of time matters.
Pier 39 wrap-up: finish with the bay energy
The final stop is Pier 39, a natural ending point. It’s a place people associate with the waterfront entertainment zone, so ending here feels like closing the story with a familiar chapter.
Because the activity ends back near your meeting point, the route also has a built-in sense of completion. You’re not wondering where you’ll land; you’re finishing where you started.
Photo challenges and roles: how to keep the game fun for everyone
Each player gets an individual role, and you can choose between Braniac, Photographer, or Mapper. This is a smart design choice for groups, because it reduces the frustration that comes when everyone feels like they’re doing the same job.
- Braniac-type roles tend to fit people who like puzzles and logic.
- Photographer-type roles fit people who enjoy angles, composition, and capturing moments quickly.
- Mapper-type roles fit people who like directions and turning the app’s information into movement.
The app includes leaderboards too, so there’s friendly competition without requiring you to be sporty or athletic. And since you get digital copies of the photos, your group leaves with more than memories—you’ll have the actual outputs from the missions.
Who this scavenger hunt is best for
This is great if you want a fun, structured way to experience the Fisherman’s Wharf area without a guide. It’s also ideal for families with different ages, because the role system spreads involvement across the team.
It’s a good pick for people who like challenges. The questions can be tricky, but the overall vibe is still playful. You get the satisfaction of solving and moving forward together.
And it’s a solid choice if you’ve been to San Francisco before and want something other than a standard highlights walk. This turns landmarks into tasks, which makes the familiar feel fresh.
Who should think twice (and how to make it easier)
If your group hates anything app-based, this might feel like extra friction. The whole experience runs through a mobile ticket and the Let’s Roam app, so you’ll be leaning on your phone the entire time.
If your group has limited mobility, you should consider the moderate physical fitness level mentioned for the tour and wear comfortable shoes. The route includes several well-known areas that may involve hills or stairs depending on your walking path.
Finally, if you’re worried about getting started, don’t rush. Set up the app at the meeting point, test that you can load your first clue, and only then begin walking.
Should you book this Fisherman’s Wharf scavenger hunt?
If you want a two-hour activity that mixes competition, landmark spotting, and photo prompts—and you’re okay navigating with an app—this is a strong choice. The flexibility to start anytime is especially valuable on a city trip where schedules usually wobble.
I’d recommend it for families, friends, and small groups who like learning through doing. You’ll likely have the most fun if you treat the route like a game first and a sightseeing walk second, so the missions don’t get overshadowed by wandering.
If you know you’ll struggle with tech on the go, budget extra time at the start point to get comfortable. Once the hunt is running, the game is built to keep you on track and help you enjoy the Wharf area at a walking pace.
FAQ
How long does the Fisherman’s Wharf scavenger hunt take?
It’s about 2 hours (approx.).
Can I start the hunt at any time?
Yes. You can start whenever you want, with no set time to begin.
Where does the hunt start?
The starting meeting point is 2350 Taylor St, San Francisco, CA 94133, USA.
What do I need to use during the hunt?
You’ll use the Let’s Roam app for maps, photo challenges, riddles, and leaderboards. The tour also advises making sure your phone is fully charged, and bringing a power bank if needed.
Is there a guide with you?
No. It’s self-guided, and there is no tour guide included.
Can I get a refund if I cancel?
No. This experience is non-refundable and cannot be changed for any reason.
More Tour Reviews in San Francisco
- Muir Woods and Sausalito (Return by Bus or Ferry)★ 4.5 · 5,098 reviews
- Big Bus SF: Hop-on Hop-off Tour with 17 Stops and Sunset Option★ 4.0 · 4,539 reviews
- Napa and Sonoma Wine Country Full-Day Tour from San Francisco★ 4.5 · 4,455 reviews
- Small Group Yosemite and Giant Sequoias Day Trip from San Francisco★ 5.0 · 3,671 reviews
- San Francisco: Golden Gate Bay Cruise★ 4.7 · 3,644 reviews
- San Francisco: Hop-On Hop-Off Sightseeing Tour with 17 Stops★ 4.5 · 3,600 reviews
Puzzles and Hunts Around Town
- The Escape Game San Francisco: Epic 60-Minute Adventures Downtown★ 5.0 · 334 reviews
- The Escape Game San Francisco in Fisherman’s Wharf★ 5.0 · 97 reviews
- Prison Break Alcatraz Escape Room in Fisherman’s Wharf★ 5.0 · 96 reviews
- Emperor Norton’s Fantastic San Francisco Time Machine★ 5.0 · 67 reviews
- San Francisco: 7D Interactive Thrill Ride at PIER 39★ 4.7 · 35 reviews
- San Francisco: PIER 39 Flyer, 7D Ride, & Laser Maze Ticket★ 4.4 · 24 reviews
More of Fisherman’s Wharf
- San Francisco: Alcatraz, Fisherman’s Wharf & Optional Extras★ 4.4 · 663 reviews
- Inside Alcatraz Tour Including Fisherman’s Wharf Lunch Credit★ 4.0 · 505 reviews
- Alcatraz & Fisherman’s Wharf Tour + Cruise & Skystar Options★ 4.5 · 209 reviews
- San Francisco Combo: Ferry Building Food Tour and Alcatraz★ 4.5 · 152 reviews
- The Escape Game San Francisco in Fisherman’s Wharf★ 5.0 · 97 reviews
- Prison Break Alcatraz Escape Room in Fisherman’s Wharf★ 5.0 · 96 reviews
Just Reviewed: Fresh San Francisco Tours
- Private San Francisco City Tour + Alcatraz (Tickets Incl., Max 6)
★ 5.0 · 3 reviews - San Francisco: North Beach Food and History Walking Tour
★ 5.0 · 3 reviews - San Francisco Bay Cruise and City Combo Tour
★ 3.5 · 3 reviews - San Francisco City Half-Day Private Custom Tour
★ 5.0 · 3 reviews - San Francisco: Muir Woods, Point Reyes, and Meadery Tour
★ 4.2 · 3 reviews - Private Muir Woods and Sausalito Half Day Tour
★ 5.0 · 3 reviews
Fisherman's Wharf & Pier 39, compared.
 ★ 4.4Alcatraz, Fisherman’s Wharf & Optional ExtrasFrom $99663 reviews
 ★ 4.0Inside Alcatraz Tour Including Fisherman’s Wharf Lunch CreditFrom $89505 reviews
 ★ 4.5Alcatraz & Fisherman’s Wharf Tour + Cruise & Skystar OptionsFrom $99209 reviews
 ★ 4.5San Francisco Combo: Ferry Building Food Tour and AlcatrazFrom $181152 reviews
 ★ 5.0The Escape Game San Francisco in Fisherman’s WharfFrom $4597 reviews
 ★ 5.0Prison Break Alcatraz Escape Room in Fisherman’s WharfFrom $4596 reviews
 ★ 5.0Fisherman’s Wharf Walking TourFrom $3993 reviews
 ★ 4.5San Francisco Food Tour: Ferry Building and Ferry Plaza Farmers MarketFrom $9592 reviews
Browse the lists this tour appears in